Wednesday, January 29, 2014

Apple Kuchen

I don't know about you, but when I hear the word "kuchen" I think of a giant pancake (like the Original Pancake House's Dutch Baby or Apple Pancake). I'm not quite sure where this recipe ended up. I didn't 100% follow it as I didn't include the marmalade. I feel like we always make fun of a place, like Perkins, when they have orange marmalade on the table and say "who eats that?" so I just assumed we wouldn't need it for the recipe.

While this wasn't a bad recipe, I think I was wrong. The marmalade is necessary. Or apple butter. Or something to bring it a bit of moisture. If you're a fan of kuchen, though, definitely let me know what i may have been missing. Or just give this a try and tell me if it's close to what you'd expect...I truly had no idea what to expect when I realized it wasn't a pancake--I just needed to use up some apples!


Apple Kuchen-adapted from Best Baking Recipes by Cooking Light
Total Time: 1 hour
Serves 15

  • 3 baking apples, peeled, sliced and cored
  • 2 tablespoons lemon juice
  • 1 cup sugar, divided
  • 1/2 teaspoon ground cinnamon
  • 1/2 teaspoon salt, divided
  • 1 1/2 cups all-purpose flour
  • 1 teaspoon baking powder
  • 1/2 cup butter, softened and divided
  • 3 ounces cream cheese, softened
  • 2 large eggs
  • 1 teaspoon vanilla extract
  • 2/3 cup buttermilk
  • 1/4 cup apricot preserves or apple butter
  • 2 teaspoons apple juice
Preheat oven to 350 degrees. Combine apple slices, lemon juice, 1/4 cup granulated sugar, cinnamon and 1/4 teaspoon salt and toss to combine.

Combine flour, 1/4 teaspoon salt and baking powder in a medium bowl, stirring well. Place remaining 3/4 cup granulated sugar, 6 tablespoons butter and cream cheese in a large bowl; beat with a mixer at medium speed until light and fluffy. Add eggs, beating well. Stir in vanilla. Add flour mixture and buttermilk alternately to mixture, beginning and ending with flour mixture, beating just until combined.

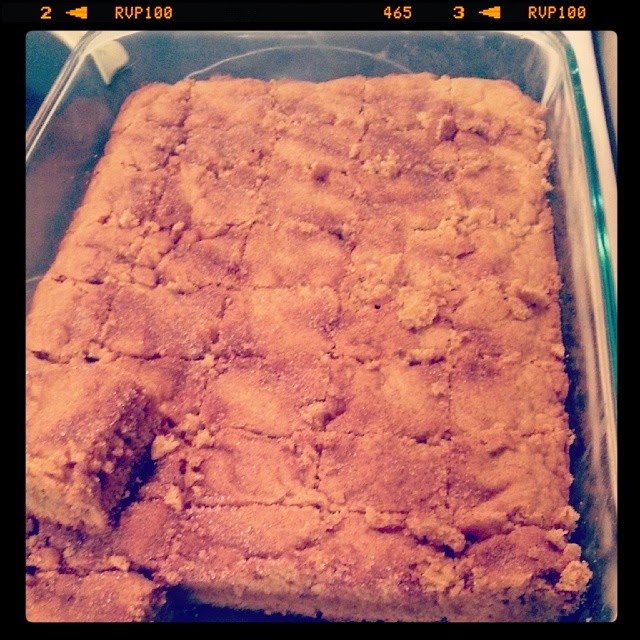
Pour batter into a 13x9 inch baking pan coated with cooking spray. Arrange apples over batter. melt remaining 2 tablespoons butter and brush over apples. Bake for 45 minutes or until set.

Combine preserves and apple juice; microwave on high for 30 seconds or until melted, stirring once. Brush mixture over apples; cool.

Monday, January 27, 2014

Heat's Homemade: Tomato Sauce

There was something I was planning on making awhile back that called for a lot of tomato juice. And for some reason I cannot remember what it was. That is very strange for me as I plan my meals out week by week, and I don't think I've ever truly skipped something.

Anyway, to try to be thrifty, I decided to buy one of those large, restaurant-sized tomato juice cans, so then I decided, when I was going to make the up-coming recipes, that I should figure out how I can make my own tomato sauce (which is slightly thicker than tomato juice) with the tomato juice I had on hand. In comes Google! This is so simple, and just add a bit more flour if it isn't getting thick enough for you!


Tomato Sauce-adapted from Global Post
Total Time: 15 Minutes
Makes 1 cup

  • 2 tablespoons butter
  • 2 tablespoons flour
  • 1 cup tomato juice
  • Additional seasoning, if desired
In a medium saucepan, melt the butter. Whisk in the flour and continue to whisk until slightly browned and bubbly. Add in tomato juice and continue to whisk until desired thickness. Add in additional flour and seasonings as needed.

Sunday, January 26, 2014

The. Best. Brownies. Ever.

As the title suggests, I'm pretty much in love with these brownies. They were the softest, chewiest, best brownies I've ever made. I'm pretty sure Scott and I could've eaten the entire pan ourselves! I can't wait to make them again.


Brownies-adapted from Babble.com
Total Time: 45 Minutes
Makes 24 brownies

  • 2 sticks butter
  • 6 ounces milk chocolate, chopped
  • 4 eggs
  • 2 cups sugar
  • 2 teaspoons vanilla extract
  • 2 tablespoons cocoa powder
  • 1 teaspoon baking powder
  • 1 teaspoon salt
  • 1 1/4 cups all-purpose flour
Preheat oven to 350 degrees. In a small microwave safe bowl, combine butter and chocolate. Heat in 30 second increments, stirring in between, until melted together. 

In a large bowl, mix together eggs, sugar, vanilla and cocoa powder. Add in chocolate mixture and still until combined. Add in baking powder, salt and flour and beat with a mixer until well combined. Pour into a greased 9x13 inch pan.

Bake for 40-45 minutes or until knife inserted in the center comes out clean.

Monday, January 20, 2014

Salsa Fish

When I come across a recipe for any kind of whitefish--tilapia or halibut for example--lately I've been substituting swai fillets. They're usually a bit cheaper at the store, and I think they taste pretty much the same!

This recipe was an...interesting one. I'm pretty sure I put too much dijon mustard because it was very tangy. And by very, I mean overly mustard-y. And I'm not really a huge mustard fan. Mistake #1. There was then also a lot of salsa to this too. I'm not sure I'd make this again. Scott liked it okay, but I wasn't overly thrilled.

If I do make this again, I think the key is to spread on the mustard and salsa to your own taste.  Then you can make sure you don't over do it like I did. Let me know if you try it!


Salsa Fish-adapted from 365 Last-Minute Meals by Better Homes and Gardens
Total Time: 20 Minutes
Serves 4

  • 4 white fish fillets (halibut, tilapia, swai, etc.)
  • 1/2 cup bottled chunky salsa
  • 2 tablespoons honey
  • 2 tablespoons dijon mustard
Preheat oven to 450 degrees. Place fish in a shallow 2-quart baking dish and bake uncovered, about 6 minutes. Drain liquid from baking dish.

Meanwhile, in a small bowl, combine salsa and honey until blended. Brush mustard onto fish and spoon salsa mixture on top. Bake for 2 to 3 minutes more or until salsa mixture is heated through.

Sunday, January 19, 2014

Ginger Soy Chicken

I recently just got myself a part-time job at a bridal salon! I'm so incredibly excited about it! But, I have a feeling this means a lot more slow-cooker meals for me and Scott! This is a great one that will definitely be added to the list!

The flavors in this dish were absolutely fantastic. The original recipe calls for chicken breast that you dice and/or shred to serve over rice. I had some bone-in chicken thighs available at home, so that's what we decided to make instead. We obviously had rice and egg rolls too, because, we can never say no to that with an Asian-inspired dishes!


Ginger Soy Chicken-adapted from Keeping Up with the Joneses
Total Time: 7 Hours
Serves 4-6 depending on chicken amount

  • 4-6 bone-in chicken thighs, or 1-2 pounds chicken breasts, diced
  • 2 tablespoons ginger, freshly grated
  • 3/4 cup chicken broth
  • 1/4 cup plus 2 tablespoons honey
  • 1 tablespoon sesame oil
  • 1 garlic clove, minced
  • 1/4 cup plus 2 tablespoons soy sauce
  • 1/4 cup plus 1 1/2 teaspoons cold water
  • 2 tablespoons cornstarch
Spray the inside of a 4-quart slow cooker with cooking spray. Place chicken in slow cooker and top with ginger, broth, honey, sesame oil, garlic and soy sauce. Cook on low 5-7 hours or until chicken is cooked through.

With a slotted spoon, remove chicken from slow cooker and keep warm on a foil wrapped plan. Strain juices from slow cooker with a mesh colander into a large saucepan. In a small bowl, whisk water and cornstarch until smooth; pour into saucepan. Cook over high heat until bubbly and slightly thickened, adding more cornstarch if necessary. 

Serve by pouring sauce over chicken. Serve with rice.

Wednesday, January 15, 2014

Chicken Pot Pockets

Chicken pot pies are one of those things that just taste so good. All. The. Time. They're warm, and inviting and just ask for you to eat them, I swear! When I came across this recipe, I was very excited to try it. Although, I have had some bad experiences with egg roll and wonton wrappers in the past that made Scott a bit nervous.

One thing I will say about this recipe-it is not easy or a very clean-to-make recipe. It just kept spilling everywhere! However, if you're quick and not afraid to not have the prettiest looking pockets (I thought I did okay), the flavors will all be there, which to me is the most important part! I actually prepared everything on the foil-lined baking sheet, instead of trying to transfer them.


Chicken Pot Pockets-adapted from 300 Under 300 by Hungry Girl
Total Time: 50 Minutes
Serves 12

  • 1 teaspoon cornstarch
  • 1 teaspoon cold water
  • 1 can cream of chicken soup
  • 2 cups frozen bite-sized mixed veggies
  • 12 ounces chicken, cooked and chopped
  • 12 large egg roll wrappers
Preheat oven to 350 degrees. In a small bowl, mix cornstarch with 1 teaspoon cold water until smooth. In a large bowl, combine cornstarch mixture with soup and mix thoroughly. Add veggies and chicken, mix well and season to taste with salt and pepper.

On a large dry surface, lay out the egg roll wrappers. Set out a small bowl of water to dip your fingers in. Place about 1/3 cup filling onto egg roll wrappers, one at a time. Quickly seal wrappers, using your finger dipped in water as needed. Gently transfer to a foil lined baking sheet. Continue until remaining filling and wrappers are used.

Bake for 20 minutes or until golden brown. 

Tuesday, January 14, 2014

Layered Greek Dip

Yesterday, I shared my new hummus recipe, and today, I want to show you what else I did with it! I made an even better hummus dip! This got to be a bit messy to be able to get everything on the pita, but oh my, was it good! I think in general, I just love the Greek flavors and can't get enough of it!


Layered Greek Dip-adapted from Self
Total Time 10 Minutes
Serves 16

  • 2 cups of your favorite hummus
  • 1 medium cucumber, chopped
  • 8 ounces cherry tomatoes, halved
  • 1 cup kalamata olives, sliced
  • 3 ounces feta cheese, crumbled
  • 1 tablespoon dried basil
  • Pita bread or chips for dipping
On a plate or platter, spread the hummus evenly. Top with cucumber, tomatoes, olives and feta cheese-sprinkling evenly over entire plate. Sprinkle with basil and serve with pita bread or chips.

Monday, January 13, 2014

Mushroom Hummus

I made this hummus as part of a recipe for a holiday party that I'll share with you tomorrow. I haven't had hummus in awhile, but I did have all the ingredients I needed to make it so it seemed like the best plan of action!

This was definitely the best hummus I've ever made. The flavor was absolutely fantastic. Eating this plain with some pita is pretty much the best snack! I'm just realizing now that I don't have a picture of just the hummus--I only have a picture of what was brought to the party. So you'll see it tomorrow!

Mushroom Hummus-adapted from The Mushroom Channel
Total Time: 15 Minutes
Makes 2 Cups

  • 10 ounces button mushrooms, sliced
  • 1 tablespoon butter
  • 14 ounces cooked or canned chickpeas
  • 2 cloves garlic, chopped
  • 1/2 cup peanut butter
  • 3 tablespoons lemon juice
  • Salt and pepper to taste
  • 2 teaspoons cumin
  • 3 tablespoons olive oil
  • Pita bread or pita chips, for serving
Melt butter in a medium skillet over medium heat. Saute mushrooms until cooked through. Let cool slightly.

In the bowl of a food processor, pulse chickpeas, garlic, peanut butter, lemon juice, salt, pepper and cumin until beginning to blend. Add in olive oil and blend until well combined. Add additional seasoning as needed. Serve with pita or pita chips.

Sunday, January 12, 2014

Monkey Bread

After Scott and I spent our first Christmas together (we had been dating for about 4 or 5 years prior to actually spending a Christmas together), I learned one of his family traditions on Christmas day was making monkey bread. I'd also never heard of or had monkey bread before I met Scott. The only Christmas tradition we had was getting together, playing cards and eating on Christmas Eve. Then Christmas morning opening presents under the tree.

Since my family is from Minneapolis and Scott's is from Milwaukee, since we've moved in together we decided to spend Thanksgiving with one family and Christmas with the other. This year, we got to spend Christmas in Minneapolis. I decided to plan on making monkey bread Christmas day as I had never made it and just thought it would be fun for the two of us to make something together.

I truly loved this! It was sweet and savory and filled you up! It's also really easy to make, so I'd definitely recommend making it.


Monkey Bread-adapted from Pillsbury
Total Time 45 Minutes
Serves 12
  • 1/2 cup granulated sugar
  • 1 teaspoon cinnamon
  • 2 cans refrigerated buttermilk biscuits
  • 1 cup brown sugar
  • 3/4 cup butter, melted
Preheat oven to 350 degrees. In a gallon size plastic bag, mix together sugar and cinnamon. Cut biscuits into quarters and toss in bag with cinnamon sugar. Arrange in a greased bundt pan.

In a small bowl, mix brown sugar and melted butter. Pour over biscuits.

Bake 28 to 32 minutes or until golden brown. Cool for about 10 minutes, then turn onto a plate to serve.


Friday, January 10, 2014

Pizza Pasta Casserole

As part of my Christmas gifts this year, I wanted to cook a few things. To do this, I made my very good friend Ashley, who just had her third daughter (!), some casseroles that can be frozen for up to three months. Since she has two little ones that would eat this, and a sometimes-picky husband, I decided to go with a standard pasta without anything too crazy to it. I didn't get to try this dish as I gave them to her, but they looked tasty!

This recipe is enough for two 9x13 inch pans. Each can be frozen up to 3 months before cooking.


Pizza Pasta Casserole-adapted from Taste of Home
Total Time: 45 Minutes
Serves 16
  • 16 ounces penne pasta
  • 2 pounds ground beef
  • 1 large onion, diced
  • 2 garlic cloves, minced
  • 32 ounces spaghetti sauce
  • 16 ounces shredded mozzarella cheese
  • 8 ounces pepperoni slices
Cook pasta according to package directions. In a large skillet, cook beef, onions and garlic over medium heat until meat is browned. Drain, return to pan and add spaghetti sauce and cooked pasta until heated through.

Turn pasta into two greased 9x13 inch pans. Top evenly with mozzarella and pepperoni. If cooking immediately, cook uncovered at 350 degrees for 25-30 minutes, or until heated through and bubbly.

Freeze the other casserole. When ready to cook, thaw in refrigerator overnight. Cook in a 350 degree oven for 35-45 minutes or until heated through and bubbly.


Thursday, January 9, 2014

Wheat Thin Cookies

These cookies are a Christmas tradition around our house. My mom has made them every year, and they are Scott's favorite cookies! This year, as one of my Christmas gifts, I made a bunch of cookies for someone's present (he's a dessert fiend). Scott asked that I try making my mom's cookies, and I knew exactly what he meant right away!

I now know why my mom only makes these once a year. They are very putsy to make. Like take a lot of time and repetition. In the end, it's totally worth it, but you want to be sitting at a good table with a good movie on or music or something! As always with classic recipes, I felt like mine just didn't turn out as good as my mom's, but we got the jist of it!

Also, as you'll tell from the recipe, it's not very technical...


Wheat Thin Cookies
Total Time: 30 minutes-1 hour, depending on how many you make

  • 24 ounces white or milk chocolate almond bark
  • 1 large box wheat thins
  • 1 jar peanut butter
In a microwave safe bowl, break up the almond bark slightly. Melt in microwave in 30 second increments, stirring in between. 

Meanwhile, take one wheat thin cracker, place a thin layer of peanut butter, and top with another wheat thin cracker. Repeat with the rest of the crackers. 

Dip the cracker sandwiches into the melted almond bark until covered on both sides. Place and let cool and harden on a wax paper lined baking sheet. Keep refrigerated in an air tight container.

Wednesday, January 8, 2014

Mallo Cups

A family tradition from going up north to see my grandparents (on my mom's side) was always to stop at a gas station and get some Mallo Cups. I don't know why, but you just can't find them in Minneapolis gas stations! They're all over the Milwaukee area now. My mom loved these and was the one that got me hooked!

When I came across this recipe online, I knew this was what I wanted to make my mom for Christmas. Overall I thought the flavors were perfect! As I mentioned in my post yesterday, I didn't let the marshmallow fluff get firm enough so they ended up being quite messy. Either way though, they were great! Just really putzy to make-they take a lot of time to cool in between steps, but for a special someone, it's worth it!


Mallo Cups-adapted from How Sweet It Is
Total Time: 1 Hour
Makes 12 Cups

  • 12 ounces milk chocolate
  • 2 tablespoons coconut oil
  • 1 cup marshmallow fluff
  • 1/3 cup sweetened, flaked coconut
Line a 12-cup muffin tin with liners of your choosing.

Melt the chocolate in a microwave safe blow in 30 second increments, stirring frequently, until melted. Once melted, stir in the coconut oil until melted. Spoon 1 1/2 tablespoons of chocolate into the bottom of the muffin liners and use a spoon to bring the chocolate up the sides. Sprinkle the chocolate with a teaspoon of the coconut. Put the muffin tin in the fridge or freezer about 20 minutes or until it sets.

Spoon 1 1/2 tablespoons of the marshmallow fluff onto of the hardened chocolate and sprinkle with the remaining coconut. Put back into the fridge or freezer for another 20 minutes or until firm.

Remelt the remaining chocolate as needed. Spoon over the top of the cups and smooth. Place in the fridge or freezer another 20 minutes until set. Remove from muffin tin and keep cold until eating.

Tuesday, January 7, 2014

Heat's Homemade: Marshmallow Fluff

Tomorrow, I will be showing you what I made this marshmallow fluff for as I'm usually not a huge sweet fan. The original recipe calls for the use of a stand mixer. I don't yet have one of those. I know, right? Isn't that just terrible? Believe me, I've been asking for one! Didn't happen this Christmas, but I'm relatively confident I'll get one within the next year...between the wedding and the registry discounts it WILL happen.

Anyway, I don't have a stand mixer so I used a hand mixer. I don't think I let it mix enough to be honest. But my hand was starting to hurt, so I kind of gave up. But it tasted great! I think it just could've been a bit more stiff, so I'd say the important part of this is making sure there get to be stiff peaks!


Homemade Marshmallow Fluff-adapted from How Sweet It Is
Total Time: 10 Minutes
Serves I have no idea...I didn't measure it. More than tomorrow's recipe

  • 2 large egg whites
  • 1/4 teaspoon cream of tartar
  • 2/3 cup white corn syrup
  • 1/2 cup white sugar
  • 1/4 cup water
  • 1/2 teaspoon vanilla extract
  • pinch salt
Whisk the egg whites and cream of tartar in a large bowl until white and fluffy. In a small sauce pan, heat corn syrup, sugar and water over medium heat until mixture boils. Let boil about 5 minutes, or until temperature reaches 240 degrees with a candy thermometer. 

Carefully pour the hot mixture into the egg whites while beating with a whisk attachment or hand mixer. Add in the vanilla and salt. Continue to mix for about 5 minutes or until stiff peaks form. Store the remainder in the fridge.

Monday, January 6, 2014

Cheesy Sausage Egg Bake

We celebrate the holidays a little differently since Scott and I moved to Milwaukee. His family is here, but my family is about 5 hours away, in  Minneapolis. Because of this, there's no way we'd be able to see both families for all holidays. Therefore, we decided to just do Thanksgiving with one family, Christmas with the other. The next year, we swap. For us, this works pretty well.

This year, we spent Christmas in Minneapolis, so the weekend before, we went to Scott's mom's house and had brunch. I said we'd bring the egg dish, much like we did the day before. Here's a picture of the lovely snowstorm we had the morning of our Christmas celebration. Scott's mom's is only a mile or two down the road, but it took us almost 15 minutes to get there!


And because I feel like sharing, this is probably one of my favorite gifts from Christmas from my soon-to-be sister in law! A wine cork holder! Our wedding is likely going to be wine-themed, and I was thinking of making a cork H for "Harris," but for now it works for Heather too! You can also see we have some wine drinking to do.


When I asked Scott what he wanted to make, he just said, "Something with Bisquick in it." I was a bit skeptical, but everything we've made into a Bisquick bake lately has turned out really good.

This recipe turned out absolutely fantastic! You could really add whatever veggies or meat you want to it and make it your own. It's very easy to make and you can prepare it up to 12 hours ahead of time so you don't have to worry about getting up super early to get breakfast ready!


Cheesy Sausage Egg Bake-adapted from Betty Crocker
Total Time: 60 Minutes
Serves 12
  • 1 tablespoon butter
  • 4 ounces mushrooms, sliced
  • 1 small onion, diced
  • 1 pound Italian sausage, cooked and drained
  • 2 cups cheddar cheese, shredded
  • 1 1/4 cups Bisquick mix
  • 1 cup 1% milk
  • 1 1/2 teaspoons salt
  • 1 1/2 teaspoons oregano
  • 1 teaspoon black pepper
  • 12 eggs
If cooking right away, preheat oven to 350 degrees. In a medium skillet, melt butter over medium heat and saute mushrooms and onions until tender.

Meanwhile, grease a 9x13 inch baking dish and place mushrooms, onions, sausage and cheese in the dish. In a large bowl, whisk together Bisquick, milk, salt, oregano, pepper and eggs until well blended. Pour over sausage mixture.

Bake uncovered 30-35 minutes or until golden brown on top. 

If making ahead of time, cover uncooked dish and refrigerate up to twelve hours ahead of time. Bake time may need to be slightly longer.

Sunday, January 5, 2014

Snickerdoodle Bars

For the holidays my office had a baking contest. Obviously, I had to enter something. I didn't win any of the prizes, but I sure got a lot of compliments on these!

As I'm sure I've mentioned before, snickerdoodles are my favorite cookie. We're even having cookies at our wedding instead of cake (we just aren't cake people) and snickerdoodles are a must have flavor for me. When I saw these in bar form, I just knew I had to have them! As my coworker Brett said, snickerdoodles in bar form just seems like an impossible dream:


These were so easy to throw together and to be completely honest, I always have all the ingredients on hand! When you're craving something sweet, just pop these in the oven. I also tried out my homemade brown sugar for the first time with this recipe (link in the ingredient list below).


Snickerdoodle Bars-adapted from The Pinterest Project
Total Time: 45 Minutes
Makes 24 bars

  • 2 2/3 cups flour
  • 2 teaspoons baking powder
  • 1 teaspoon cinnamon
  • 1/4 teaspoon ground nutmeg
  • 1 teaspoon salt
  • 2 cups light brown sugar
  • 1 cup softened butter
  • 2 eggs, at room temperature
  • 1 teaspoon vanilla extract
  • 2 tablespoons white sugar
  • 2 teaspoons cinnamon
Preheat oven to 350 degrees. In a large bowl, combine flour, baking powder, cinnamon, nutmeg and salt. In a separate large bowl, beat together brown sugar and better for 3-5 minutes. Add in eggs one at a time and vanilla extract and beat until well blended and smooth.

Stir in flour mixture and combine until blended. Pour into a greased 9x13 inch baking dish. In a small bowl, combine two tablespoons white sugar and 2 teaspoons cinnamon. Sprinkle cinnamon sugar over prepared pan. Bake for 25-28 minutes, or until golden brown. Allow to cool slightly before cutting into bars.

Friday, January 3, 2014

Bacon and Caramelized Onion Dip

Onion dip is one of those sinful, prepackaged dips that I just can't say no to. If you have some good ruffled potato chips with it, it is just all I want to eat all night. When I came across this recipe, I knew I had to make it. Being able to make my own onion dip? And on top of it, adding BACON to it...who in the world can say no to that? Not this girl.

Side note, if you didn't know, bacon is pretty much one of my favorite things of all time. I'm technically watching what I eat, but by no means am I going to cut bacon out of my life. Just imagine how sad that would be. No bacon....I don't want to think about it!

Anyway, back to the recipe. I made this for a family holiday gathering, and then had a second request to make this for a Friendsmas we had later in the month. And since I'm so behind on posting, I can write about them both in just one post, instead of a post and an update.

This is super easy, and you just play with the extra seasoning to get it to taste just like you want it. I'd recommend making this about 30 minutes before you want to serve it as I thought it got better the longer it would sit and the flavors were able to meld.

I also used the homemade brown sugar recipe I told you about yesterday for the onions. And to be completely honest, I got lazy and didn't mix the sugar and molasses beforehand. Just threw it all into the skillet. Works fantastic-I love a shortcut :)

For the bacon, I prefer to chop it into pieces before cooking-it just seems to make better chunks. If you prefer to cook it in sliced first, certainly go right ahead. I won't judge.

PS do you like my cute little snowman dish?


Bacon and Caramelized Onion Dips-adapted from Smells Like Home
Total Time: 20 Minutes
Makes 2 cups
  • 1 tablespoon butter
  • 1 tablespoon olive oil
  • 1 large onion, sliced or diced
  • 1 teaspoon light brown sugar
  • 1 tablespoon water
  • 6 slices bacon, sliced into 1/4-inch pieces
  • 1 teaspoon cider vinegar
  • 16 ounces sour cream
  • Seasoned salt, seasoned pepper, cayenne pepper and garlic salt to taste-I used about 1/4 teaspoon cayenne and a couple good shakes of the additional seasonings, but it's really what YOU are looking for that counts, ya know?
  • Ruffled potato chips for serving

In a large skillet, melt butter and oil over high heat. Add in onions, brown sugar and water. Cook until onions are soft and a dark brown, caramely color. If they start to brown too quickly, turn down the heat. This should take somewhere between 5-10 minutes.

In a separate skillet, cook bacon over medium heat until crisp. Drain the grease and put the bacon on a plate lined with paper towel to drain off more of the grease.

In a small bowl, mix onions, bacon, cider vinegar, sour cream and seasonings together until well blended and a nice brown color. Add in additional seasoning as needed-you know you'll be tasting as you go! Serve with ruffles.

Thursday, January 2, 2014

Heat's Homemade: Brown Sugar

Did you know that you can make your own brown sugar??? I had absolutely no idea, and I honestly can't believe I've gone so long without it. The brown sugar I buy from the store always sits in a container forever with a stale piece of bread. Well, let me tell you, that is no longer happening! I've now used this recipe a few times and won't ever spend money on store-bought brown sugar again--it's just too easy! And you can just make exactly the amount you need, instead of taking up additional space in your cupboards. I'm ah-mazed!


Homemade Brown Sugar-adapted from 100 Dollars a Month
Total Time: 5 minutes
Make--as much as you want :)

  • 1 cup granulated sugar
  • 1 tablespoon molasses for light brown sugar, 2 tablespoons molasses for dark brown sugar
Place the sugar and molasses in a a bowl and mix on low with a hand mixer. This will be sticky and lumpy for a bit, but keep on for a few minutes and it will blend together. You can make a batch ahead of time and store in an airtight container, if you wish.

Wednesday, January 1, 2014

Tortellini Salad with Garlic Vinaigrette

Pasta salads are probably my favorite thing to take to parties. They're just so easy to put together ahead of time, and you don't have to worry about keeping them particularly cold or hot, as long as they aren't out so long you have to think about bacteria issues (yuck). Tortellini is one of my favorite pastas to put in pasta salad simply because it's so hearty and gives extra texture to the dish.

I loved this particular recipe. I thought the vinaigrette was sweet yet tangy, and adding the peperoncini's just added a little something extra. I also liked that the dressing can be added up to a day before, without worrying about sogginess. Using the tri-colored tortellini brought some extra color to the dish which is always fun too!

Tortellini Salad with Garlic Vinaigrette-adapted from That's Some Good Cookin'
Total Time: 20 Minutes + time for chilling
Serves 10
Dressing

  • 1/3 cup olive oil
  • 1/2 cup + 2 tablespoons vinegar
  • 2 tablespoons mayonnaise
  • 2 teaspoons Italian seasoning
  • 1 teaspoon salt
  • 1/4 teaspoon red pepper flakes
  • 3 cloves garlic, chopped
  • 1 tablespoon dried basil
Pasta
  • 20 ounces refrigerated cheese tortellini
  • 8 ounces grape tomatoes, halved
  • 1 small onion, diced
  • 1 can artichoke hearts, drained and roughly chopped
  • 1 cup kalamata olives, sliced
  • 2 tablespoons chopped peperoncini
Prepare pasta according to package directions. Drain and rinse, and set aside to cool slightly.

Meanwhile, in a small bowl, combine all ingredients for dressing and whisk well. 

Place pasta in a large serving bowl, and add in other ingredients for the pasta. Drizzle with dressing and toss lightly to coat. Refrigerate at least one hour to cool completely.

This can be prepared up to 24 hours in advance. Just stir the pasta before serving.

LinkWithin

Related Posts with Thumbnails